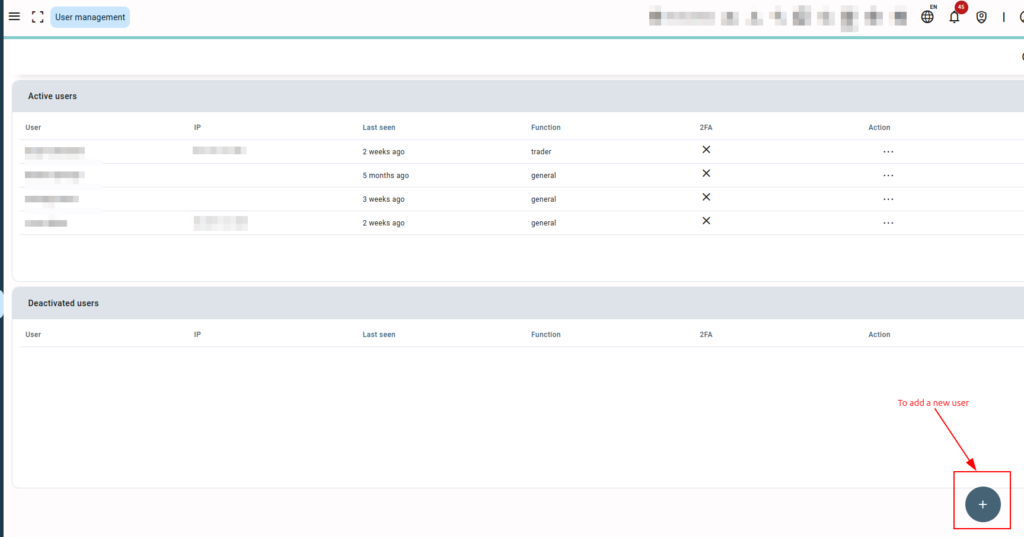
After setting up Qbil-Trade, you are now able to give your users access to Qbil-Trade as per their roles and responsibilities to trade efficiently. This can be done by creating and setting up separate user accounts in the User Management sub-menu of the Administration menu. Creating separate user accounts for all users helps create a structured and organized environment where users can work efficiently and securely.

New user accounts can be created by the Qbil-Trade user who has administrator rights. To create and set up new user accounts, follow the below steps:
- Click the Administrator menu in the top bar menu to navigate to User Management.
- Click or press “+.”


- Enter the username and name of the user. The name is considered the full name, i.e., “John Doe” and the username is usually a variation on the full name of the user, i.e., “johndoe” or “JohnD”. We recommend keeping the same structure for all usernames added to Qbil-Trade. Make sure the username you are adding for a new user is not already used for another added user.
- Set a secure password for the user. Ensure it meets the complexity mentioned in the notice.
The password must be at least 10 characters long, with 1 uppercase, 1 lowercase, 1 special character, and 1 numeric character; it cannot start with a special character. - Enter the primary email address of the user. This primary email address is the one used for correspondence while sending or receiving various documents like contracts, invoices, offers, etc. This email address can also be used to login to the software.
Please make sure that a user’s primary email address is unique; that is, it should not be used as another user’s primary email address. - Select the function of the user. The function is the role of the user in your organization, like trader, logistic employee, or you can also mark it as general in case of no particular role or covering multiple roles within the organization.
- Select the language that will be the user’s default interface language for Qbil-Trade. The user can change this default language to their preference once they start working with Qbil-Trade.
- Select the subsidiaries whose data you want to make accessible to the user.
If a user does not have any subsidiary(ies) allowed, then even if they are granted permission, they will not be able to access any data in the different modules. - Click on “Save” to create the new user.
Users can use their user account settings to update other settings, such as preferred correspondence language, local time zone, and signature upload.
Following user setup, you must use the Permission Screen to give users access to different modules based on their roles and responsibilities within the organisation. Additionally, you can use 2FA management to set up 2FA for users, enhancing their security.
The users can begin using Qbil-trade by receiving their credentials after you have successfully set up their accounts.
Note that you can use your email address or username to access your account.


